Linux Academy - Automated Installation Of Linux
Automatic Installation of Linux
Do you frequently install Linux on a multitude of systems? Tired of constantly needing to click next or navigate the installation process? Just want to simplify your system recovery method in the event of a catastrophic loss? Automation in the answer!
Performance Objective
At the conclusion of the course the student will be able to:
- Identify two common methods to automate installation of Linux.
- Identify the four sections of an Anaconda Kickstart file.
- Identify the two methods used to create a Kickstart file.
- Create an Anaconda Kickstart file using the GUI.
- Create an Anaconda Kickstart file using the CLI.
- Identify the three deployment methods used with Kickstart.
Common Configuration Methods
Two methods of automating a Linux installation are explained here. If you are using Ubuntu or Red Hat based media for installation, you can easily employ the Red Hat method. The Ubuntu Preconfiguration method is a bit more complicated but is also a viable method. Both methods are decribed below, but the Red Hat method is the method given precedence due to ease of installation and quality of documentation.
Ubuntu Preconfiguration Files
The Ubuntu native method of performing an automated installation is through the use of preconfiguration files that can be loaded from either local media or through the network. This fills in the answers to the questions that are prompted to the user when performing an installation. This method is much more complicated as well as thorough in the number of questions asked. It is recommended that users of this method be well versed in installing Linux.
Red Hat Kickstart
Red Hat provides an automation method called Kickstart that can be used in their Anaconda installer. Kickstart files are considered less flexible but require less knowledge of the boot process to install.
Sections Of A Kickstart File
commands
The commands section is not prefaced nor does it need an ending delimiter. It contains commands used during the setup of the installation. Example commands include setting up authorization, the mouse, or language. The core of the setup is usually done inside the commands section.
#System language
lang en_US
#Language modules to install
langsupport en_US
#System keyboard
keyboard us
#System mouse
mouse
%packages
The packages section consists of all of the packages that you may wish to
install during the installation. The @Core group is installed during a
minimal installation but it will not install or configure a firewall. You can
install groups of packages by prefacing the group with the @ symbol or you
can install individual packages. You can also install all packages using an
asterisk or glob packages using the asterisk.
%packages
system-config-firewall-base
curl
nginx
sqlite
php*
@X Window System
@Sound and Video
%post
The post section will consist of commands that are run after the system is installed. Anything placed inside of the post section will be run in the chroot environment. You cannot copy scripts or RPMS from the installation during this phase. post comes at the end of the kickstart file. The order of the pre and post sections does not matter but it is recommended that you include post and then pre in order.
%post
/mnt/sysimage/bin/hostname $HOSTNAME
%end
%pre
The pre section will consist of commands that are run before the system is installed. Anything placed inside of the pre section will not be run in the chrooted install environment. pre comes at the end of the kickstart file, contrary to what you may expect by the nomenclature.
%pre
echo "NETWORKING=yes" > network
%end
Creation Methods
GUI - system-config-kickstart ( Preferred )
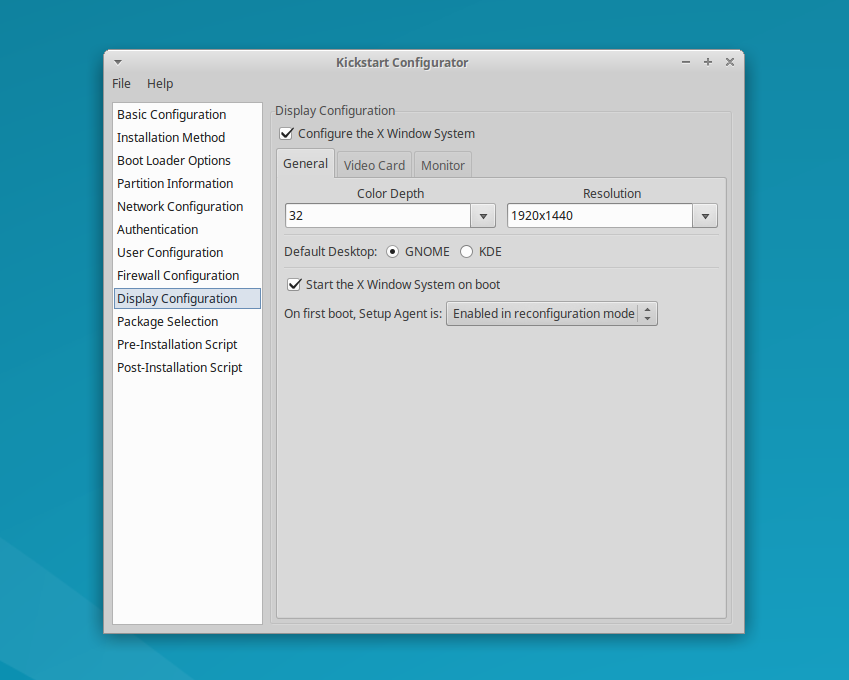
The application kickstart configurator is an easy to use tool that allows you to quickly create an example kickstart file. If you are running the X Window System you can use the configurator to quickly build a configuration file you can use as an example.
Red Hat Systems ( Centos ) Run
$ /usr/sbin/redhat-config-kickstart
Debian Systems ( Ubuntu ) Install & Run
$ sudo apt-get install system-config-kickstart
$ system-config-kickstart
CLI - vim
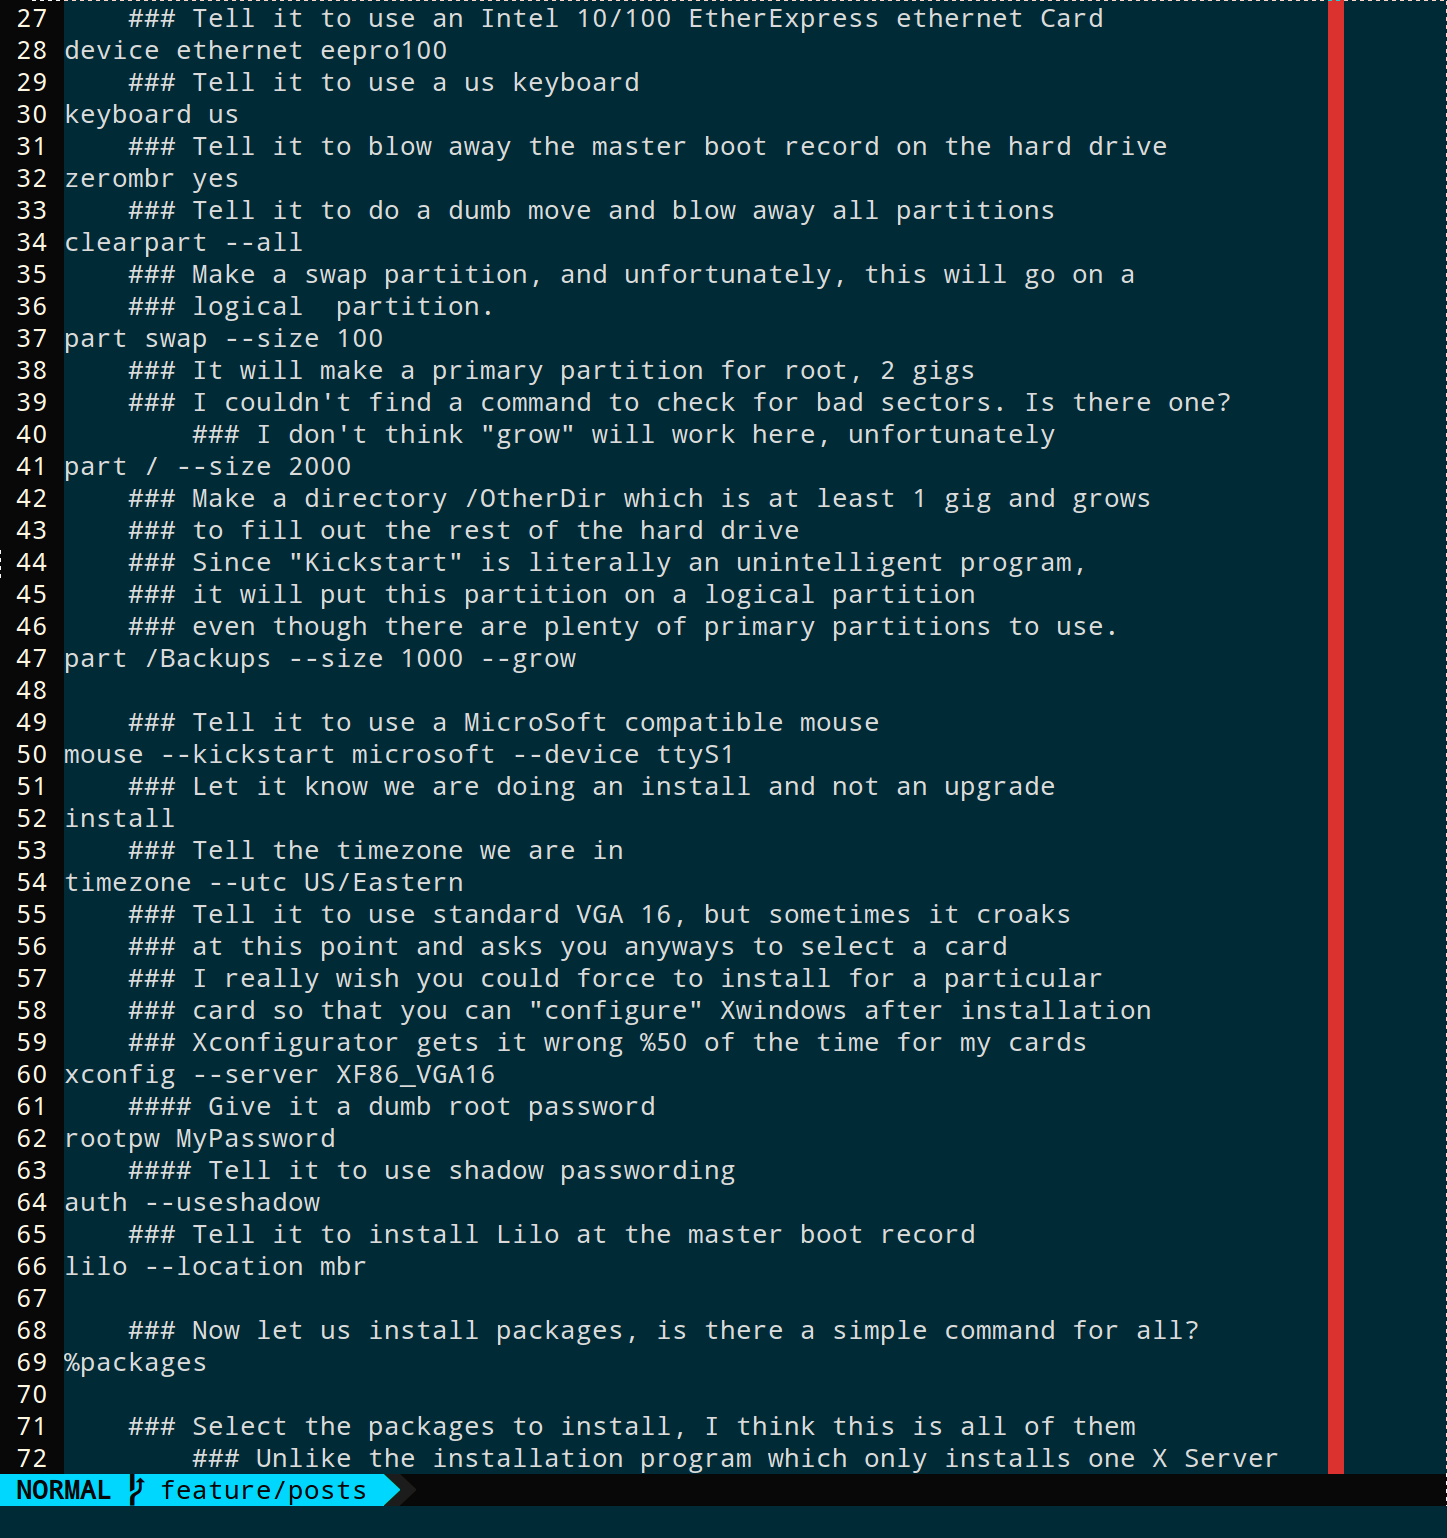
You can write the kickstart file from scratch using a tool like VIM. It is however recommended that you find an example to use or have a template built inside the kickstart configurator tool. This is a configuration file and therefore should only be edited with a text editor like VIM, VI, or EMACS. Do not edit this file using a word processor like Microsoft Word or Open Office.
Full Kickstart Example
#Generated by Kickstart Configurator
#platform=x86

#System language
lang en_US
#Language modules to install
langsupport en_US
#System keyboard
keyboard us
#System mouse
mouse
#System timezone
timezone America/Phoenix
#Root password
rootpw --disabled
#Initial user
user student --fullname "Student Person" --iscrypted --password $1$zSCRCvr5$HrbBmjnOGrZa6nmBtu5kG0
#Reboot after installation
reboot
#Use text mode install
text
#Install OS instead of upgrade
install
#Use CDROM installation media
cdrom
#System bootloader configuration
bootloader --location=mbr
#Clear the Master Boot Record
zerombr yes
#Partition clearing information
clearpart --all --initlabel
#Disk partitioning information
part / --fstype ext4 --size 1
#System authorization infomation
auth  --useshadow  --enablemd5
#Network information
network --bootproto=dhcp --device=eth0
#Firewall configuration
firewall --disabled --trust=eth0 --http --ssh
#X Window System configuration information
xconfig --depth=32 --resolution=1920x1440 --defaultdesktop=GNOME --startxonboot
#Run the Setup Agent on first boot
firstboot --reconfig
#Package install information
%packages
@ kubuntu-desktop
Deployment
In order to use a Kickstart installation, you must follow these steps:
- Create the Kickstart file.
- Make the Kickstart media available for use through one of 3 methods.
- Make the Installation media available.
- Install it.
CD-ROM / Flash Media ( Preferred )
Creation of a bootable disk is made simple by following the Red Hat Kickstart Media Method guide available from Red Hat and their documentation.
Network ( Preferred )
A network installation is possible using NFS, BOOTP/DHCP, FTP, or HTTP protocols. Setting up an FTP server, Web Server, or DHCP/BOOTP/NFS server are outside the scope of this tutorial. Further information is available through the Red Hat Documentation.
Hard Drive ( Not Preferred )
The Kickstart file can also be available on an attached hard drive that is local to the machine currently being operated on. This requires that partitioning having been completed and that the file is made available inside the system. This method is not preferred.
Conclusion
You should now be able to identify and understand what a Kickstart file is, how automation simplifies the Linux installation process, and common methods by which this type of installation is performed in theory. In practice, you will need to perform your installation using the tools and methods available to you or those methods approved by the standard operating procedures as defined at your employer. Kickstart is an easy way to automate the deployment of numerous computers in a quick and easy way. It can also be used in conjunction with Virtualization to allow you to quickly build virtual machines when necessary.
Answers
- Kickstart and Preconfiguration are two common methods to automate the installation of Linux.
- The four sections of a Kickstart file are commands, pre, post, and packages.
- Two methods to create a Kickstart file are system-config-kickstart or by hand in a text editor.
- Do by practice. (Try using the system-config-kickstart)
- Do by practice. (Try editing a template or making your own in VIM)
- The three methods to deploy a Kickstart file are Media, Network, or Hard drive based.